
So off we go again… so the formula is to start from the underneath out… I actually started the Edwardian Ribbon Corset way ahead of even deciding to research and make this, it got parked because I could not take pictures of the corset without the Chemise and Bloomers…. and so my quest continues…
Frances Grimble comes to my aid again…..
She does it again with another amazing book “The Edwardian Modiste” by Frances Grimble. http://www.lavoltapress.com/EdMod-page.htm
“The Princess Chemise” or “The Princess Slip”
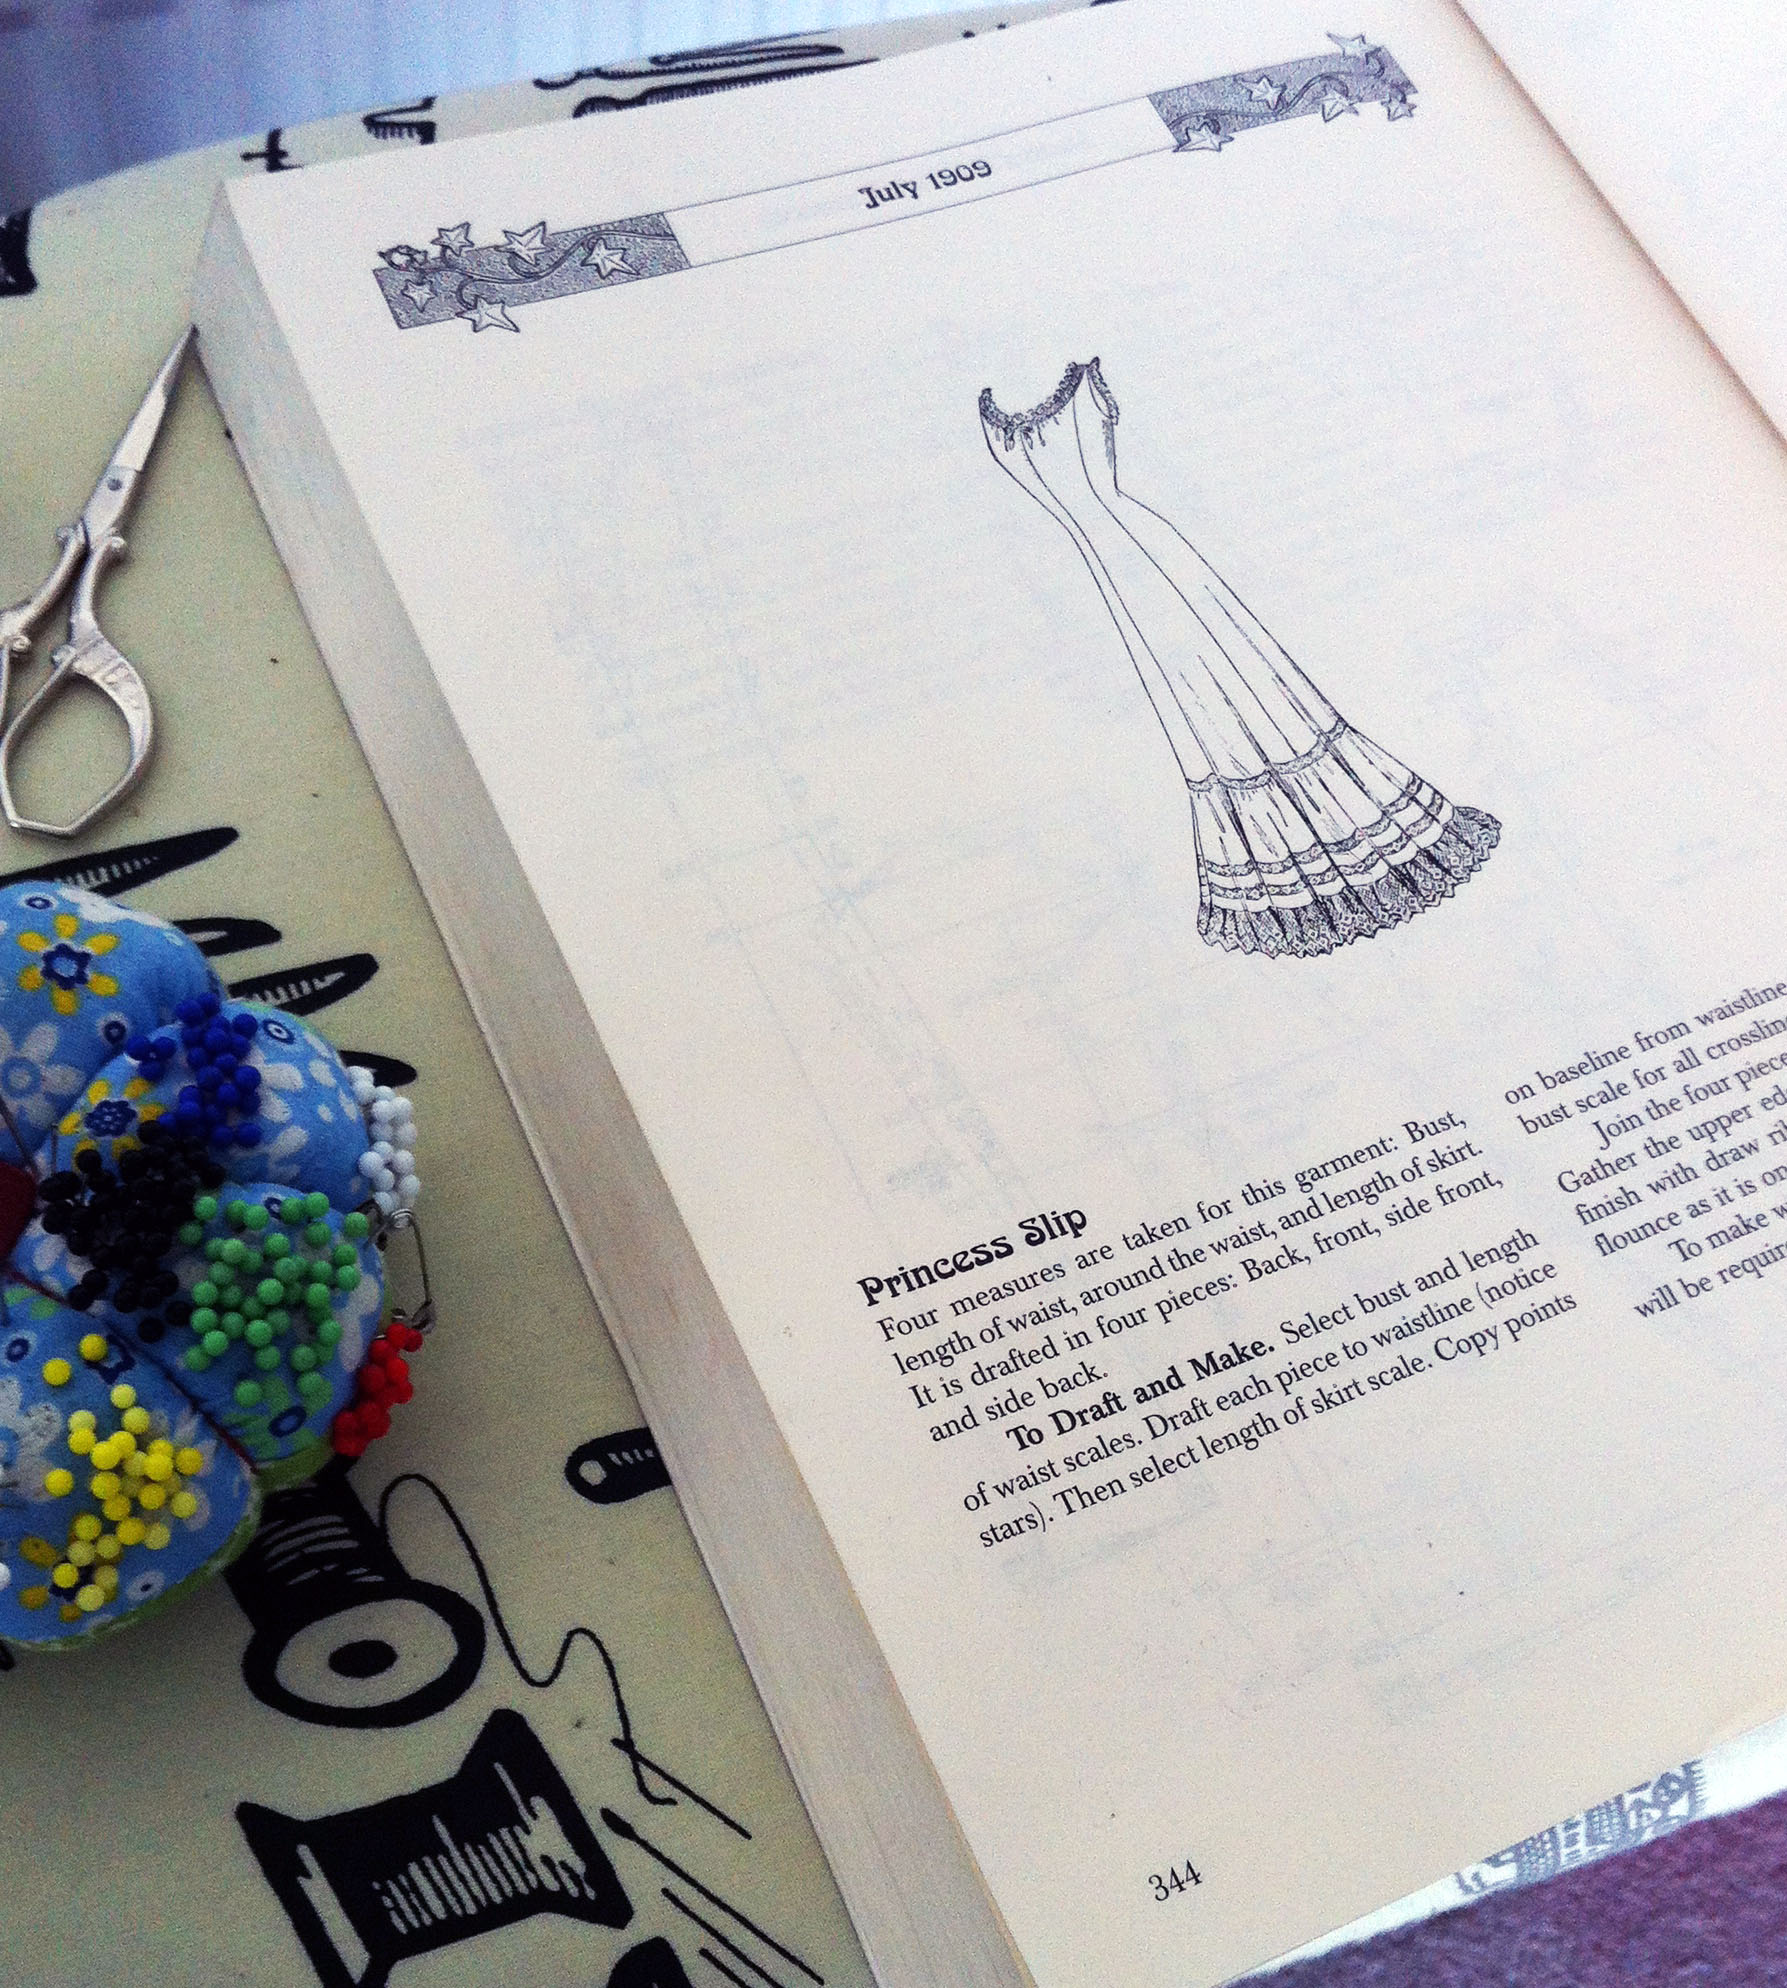
Reference Image from: The Edwardian Modiste” by Frances Grimble. Available here: http://www.lavoltapress.com/EdMod-page.htm
The Edwardian epilogue of my quest begins with this thing of beauty. The fitted style of this Chemise makes complete sense, comparing it to the Victorian version I have recently completed. The volume of bunched up fabric around the waist must have been very uncomfortable all gathered up underneath your corset and then all the layers of the outer clothing to think of as well.
Also the Edwardian corset shapes were in my eyes more extreme round the waist,
taking into consideration my great grandmothers wedding dress which had a
18” inch waist measurement!!!!
“Note to self… Must ask my Mother… Where is this dress? I need to know”
“Drafting”
Back to the the task in hand…
The pattern cutting instructions work on a Scale measurement system.
4x Measurements are needed:
(1) Bust = 88cm
(2) Length of Waist = 41cm
(3) Waist = 68cm
(4) Full Length Measure = 136cm
The using the Bust, Length of Waist and lastly the Length of Skirt scales we are all ready to begin……..
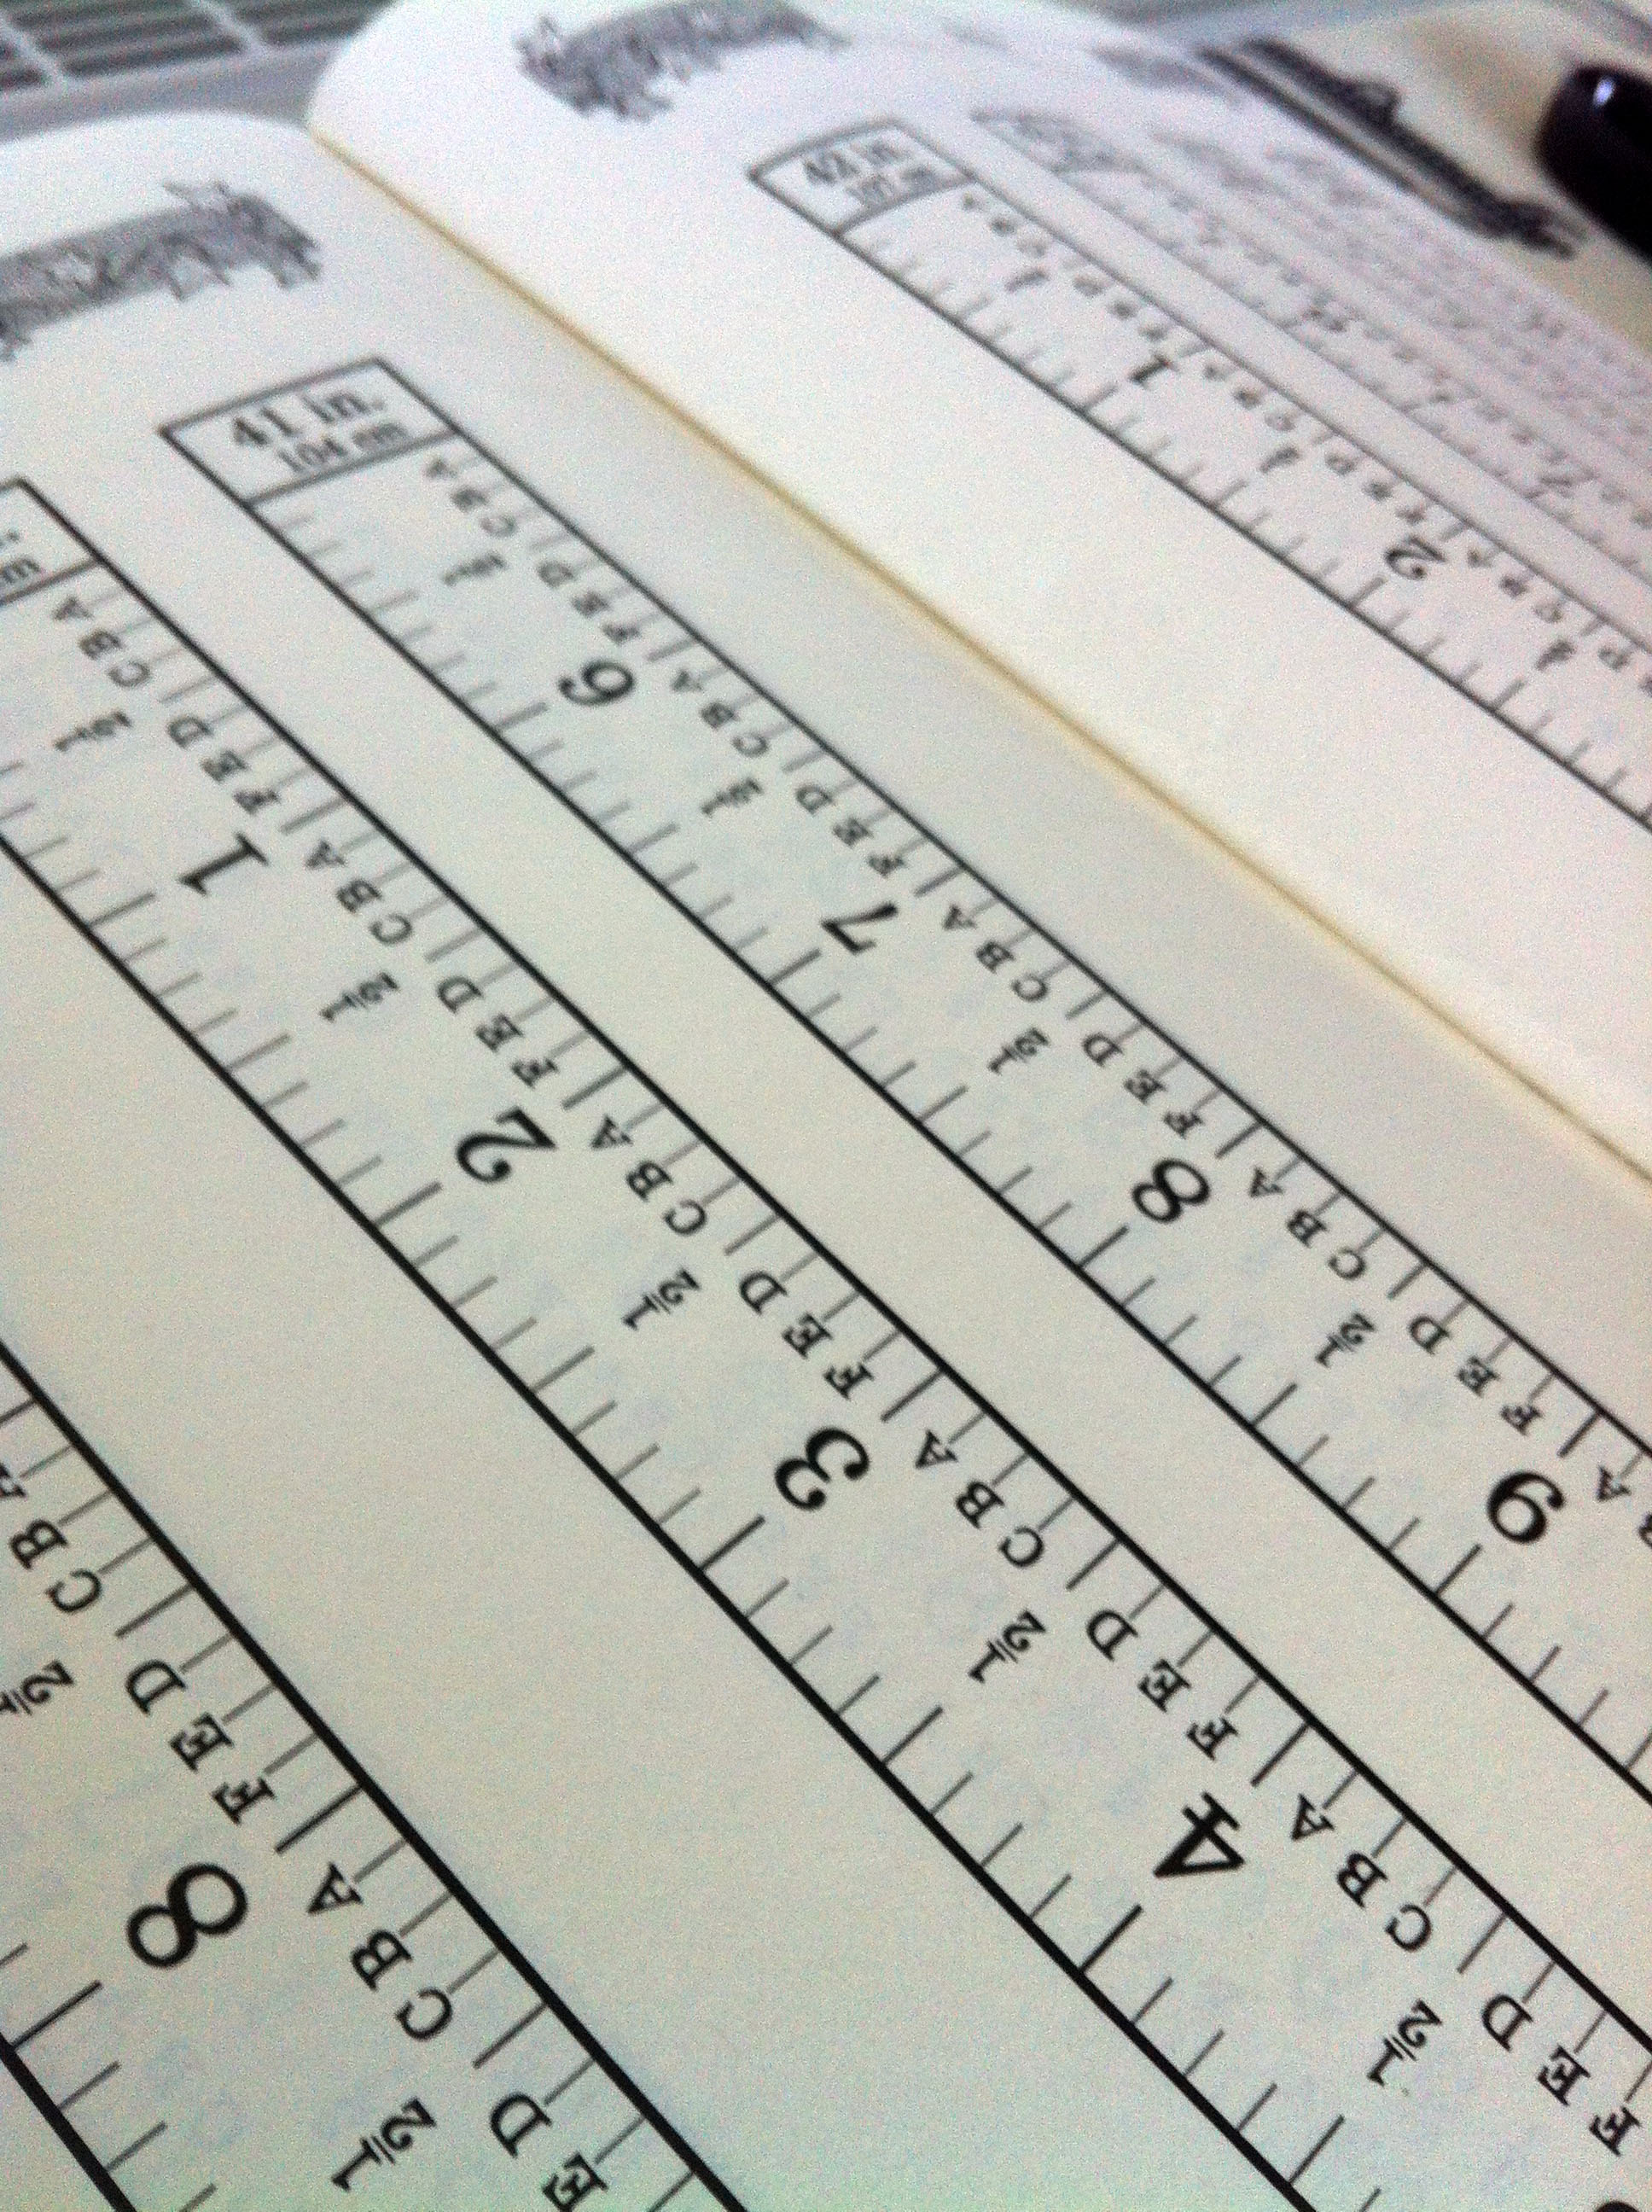
Reference Image from: The Edwardian Modiste” by Frances Grimble. Available here: http://www.lavoltapress.com/EdMod-page.htm
The Bust scale = 89cm scale, rounded up from Bust measure (1). Length of Waist measure = 41cm (2) which you x 2 = 82cm scale….. and then finally the Length of Skirt. As the instructions state; Bust and Length of waist scales are used to draft as far as the Waistline. To select the Length of Skirt scale for the vertical measurements from the waistline to the bottom of the skirt. Take the Full Length Measure (4) – Length of Waist measure = 41cm (2) = 95cm measure. This makes the Length of Skirt Scale 94cm rounded to the closest scale in the back of the book. The bust scale is used for all the horizontal cross-lines.
To summarise the final scales taken from the back of the book:
Bust Scale: 89cm
Length of Waist Scale: 81cm
Length of Skirt Scale: 96.5cm
I use Adobe Illustrator to draft this, firstly I worked out what each unit is on each scale is by using a metal ruler (I found it was easier to measure a few and then divide into the single unit) This is then times by whats on the instructions, for example (see below):
5D (across) = 45 x 1x Bust Unit, then 2F (across) = 23 x 1x Bust Unit…..
and so on and so forth.
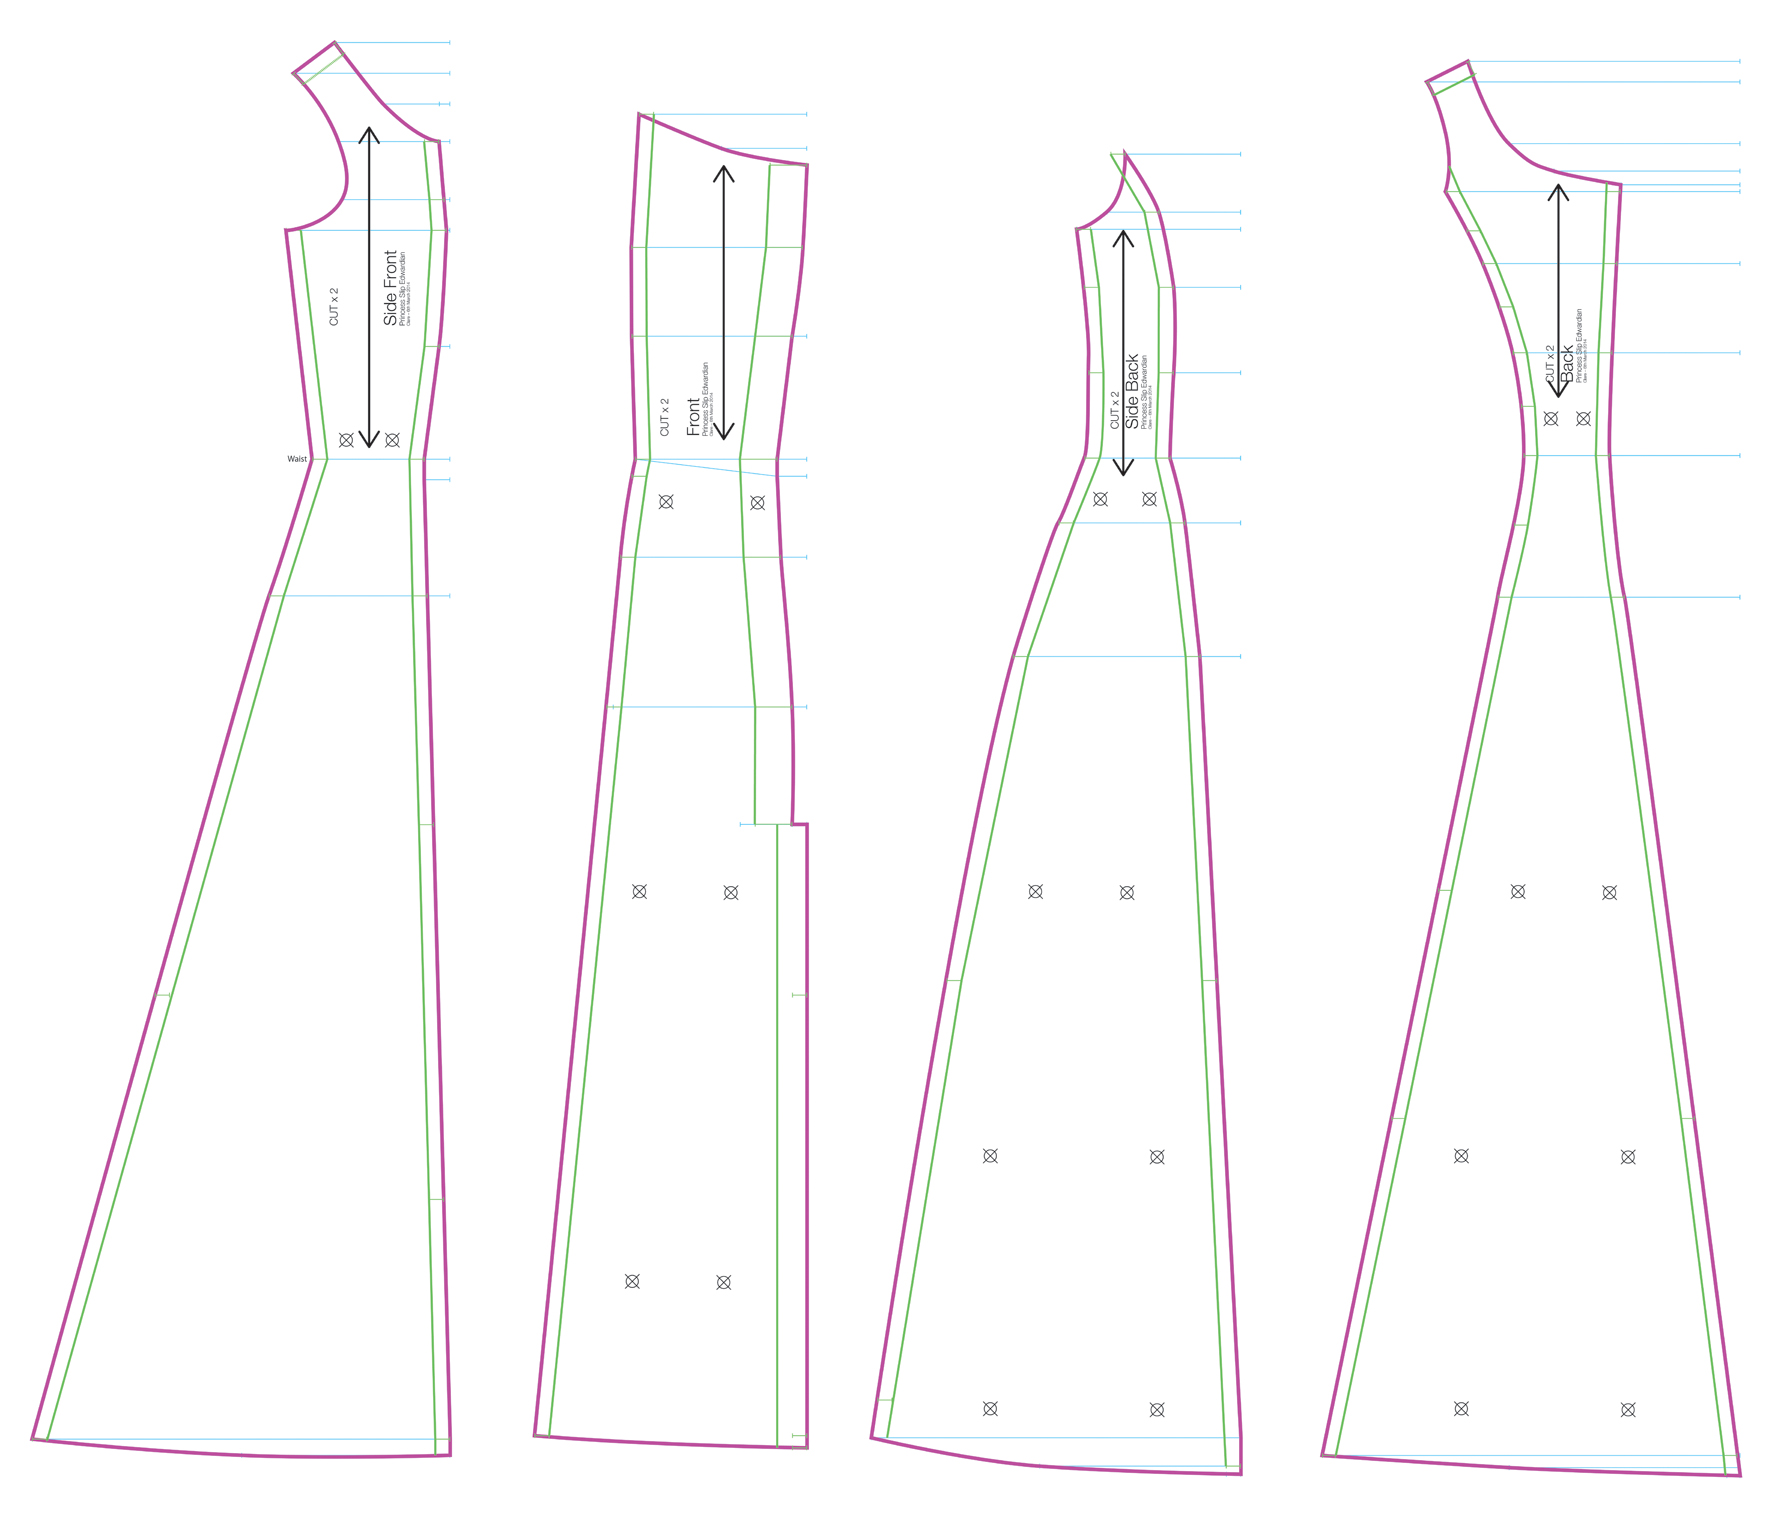
If I were drafting this out onto paper, follow the books instructions and photo-copy and join the scales together and use as a Tape measure. There are 4x pieces, which you cut 2x of each, seam allowance for a change has been added (1/2 Space Seam).. HORRAY!!

Reference Image from: The Edwardian Modiste” by Frances Grimble. Available here: http://www.lavoltapress.com/EdMod-page.htm
I completed all four parts as instructed which took time but got totally into it in the end…. A lot of number crunching into a calculator. The result looked ok BUT!!!! the waist… was it correct?
© akaMissUpton 2015
So to check I measured all 4 parts at the smallest width of the Waist, making sure I take away the seam allowances, added together = needs to be Half the Waist.
Thank the heavens I did… It was small… Phew!
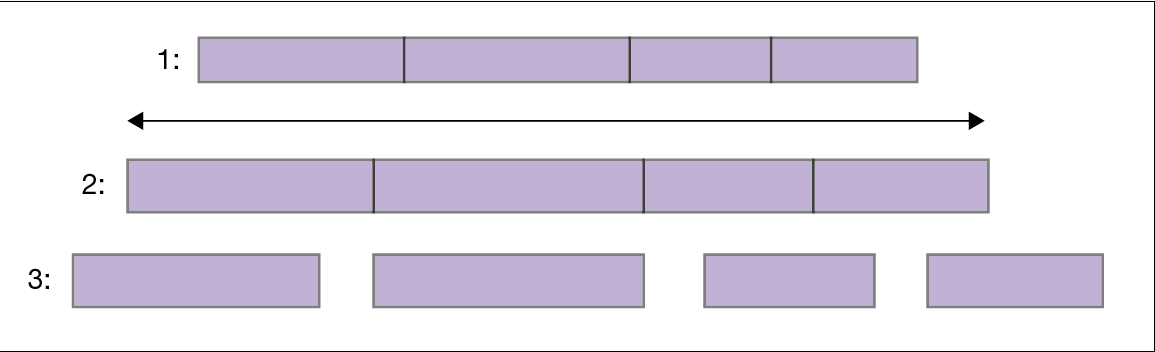
(1) I grouped these together…
(This is the beauty of using a vector based programme like Adobe Illustrator)
(2) Then scaled as a grouped object to what the halve Waist should be.
(3) Un-grouped each piece for each part.
© akaMissUpton 2015
I then enlarged at the waist, using each part as shown below:
The blue was the size from the 1st draft. The Pink is the desired measurement.

© akaMissUpton 2015
Taking this in mind I thought it was wise to check the bust in the same way and this was absolutely fine with a nice extra bit more.
STOP PRESS……
As my journey continues and I learn more things along the way, I sometimes have a moment of joy when a brain wave idea comes out to be correct… One morning on my way into work, I remembered a friend of mine using Excel spreadsheet to do mathematical calculations….. basically with a bit (actually a lot) of brain bending and a few tutorials later I set up an Excel spreadsheet so next time I want to make this garment this file will work out all the figures and calculations for me… Now that is a very grand thing. WOOOOO!!!
“Construction”
I printed out all the pieces joined together for the toile. I decided to use a medium weight cotton which will be similar to the cotton I want to use but not as expensive, also I decided not to do the full length, stopping below the hip, just to save time and material. I then marked on each piece what it was and also the seam allowance, just with a few dots and waist line.
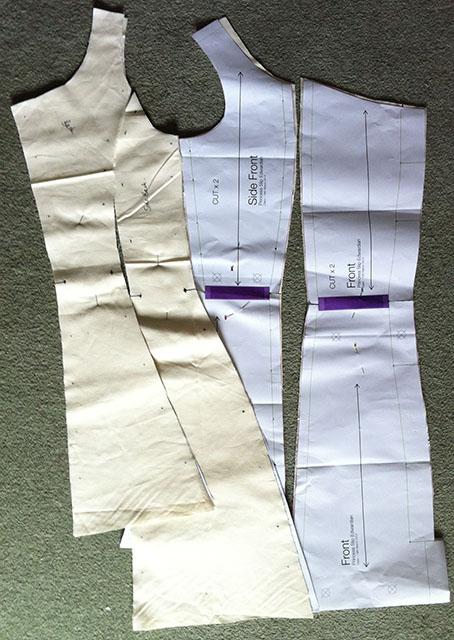
© akaMissUpton 2015
Making the toile is also a great way of checking the neckline, making sure it not to low and covers up all that it needs. I was rather excited to see how it all fitted together, to check the opening on the front, looking at all the images and the pattern above, this starts below the hips. I will then need to think about adding a placket, which is not included on the pattern.
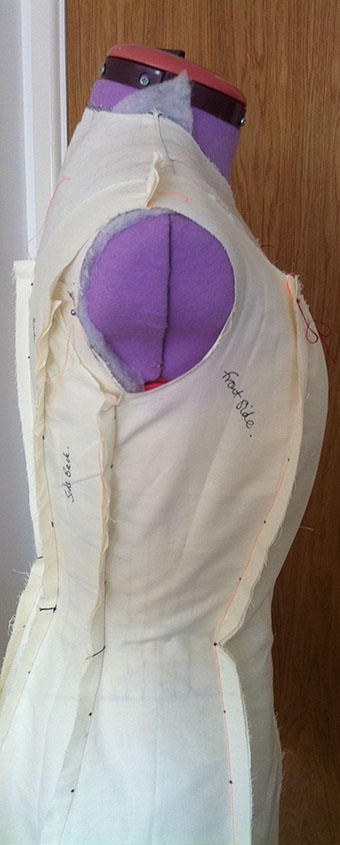
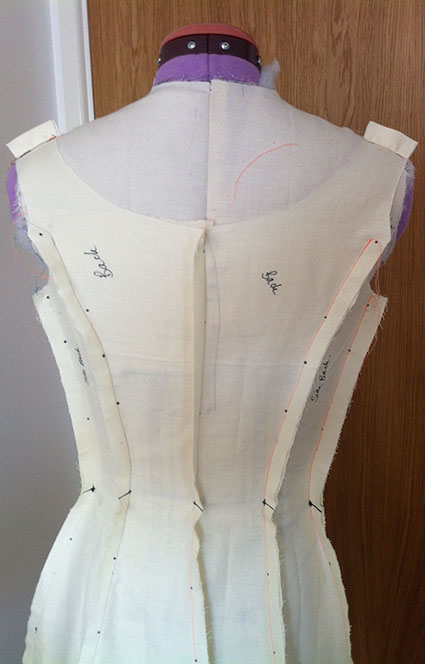
Well here we go and I am very pleased indeed… IT FITS!!!! The armhole need enlarging slightly but the back is fits perfectly, the neckline is great, though I might enlarge these front panels so there is a bit more gathering. Overall except for the arm holes that is the only thing I need to alter!!! PHEW…WOW… This then equals a very happy lady indeed.


© akaMissUpton 2015

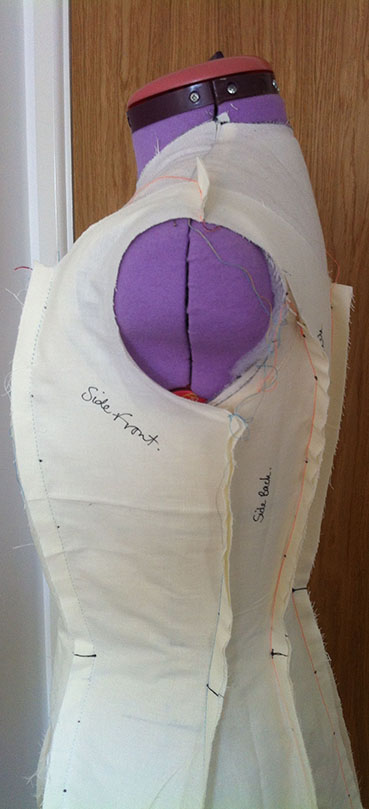
The armhole depth I take down only on the base as I don’t want to ruin the shape of the shoulder strap on the Back section, so I only reshaped the Front and Back Side sections. I then trimmed this back ‘only on one side’ so if not quite right I can redo again… then re-tried this on. When happy I transferred onto the digital pattern.

© akaMissUpton 2015


Next I began to think about the Placket.
And for those who don’t know… This is what a placket is….
Also in the back of the book there is a handy explanation which is well worth a read.
As the toile is good to go now I will practice the placket on it, another reason to make the toile. When finished I felt the test placket was too wide as I was thinking ahead again, I want to use small mother of pearl buttons and feel that the width of the placket could be just too wide, also the pattern seam needs to be changed at the bottom. I found the placket very awkward to fit, the indented seam is just not needed. I decided to make another small test using these instructions; http://off-the-cuff-shirtmaking.blogspot.co.uk/2014/01/tutorial-shirt-sleeve-placket.html “Thank you very much Pam Erny”. This is the best I could find to explain the world of Plackets, though this is for a sleeve the technique is the same. “A message to Pam” Keep up the grand work. Thank you!!!
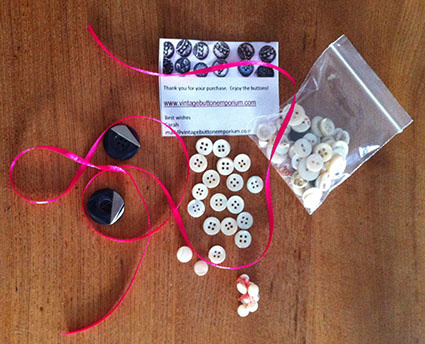
Buttons and Trimmings
I first headed straight to my mothers and then dived into the huge button tin she has. There was a wealth of what I am looking for but unfortunately not enough as I am estimating I will need at least 10-12 so Boo hiss!!!! BUT….. “Brain wave”
When you are in love with this sort of Jazz, you are always grateful for all contacts and this one was a complete gem!!! I remembered a colleague at work mentioning his mother and so….DA DAH! I introduce to you… The Vintage Button Emporium What a fantastic find this website is… Thank you so much. Got some seriously good work going on here and what a prompt service! Check out their tumbler page.. So I now have enough..
© akaMissUpton 2015
I will be using flat felled seams following the Victorian petticoat I made for the bustle project. You could also use the French seam method but I like and feel that the flat felled technique is the best to achieve a lovely flat finish, with the added benefit of all the raw edges being concealed. My only bugbear with this is a lot of pressing is required but hey I really think its worth it. Practice on the toile any techniques, then when you come to make the end garment you have a better idea and gained some confidence.
My mind moves onto the top of the front. I could keep this plain and very simple or should I follow this through to the bitter end. When it comes to lace I always suffer as I can never find what I want, you always have in your mind what you what, but can never find it… And my in experience buying online is such a gamble (would love to be proved wrong). The quality or feel is so important, but there is so much tat, so you end up wasting money and stuck with the stuff. So for the lace front, I resided to the fact that this was going to take some time… Must not rush and try all places again that I can think of… They went as follows;
Esty; If you have not discovered this website yet… Welcome!!!!! and another word DANGER!!!! https://www.etsy.com/search?q=lace%20trim&ref=auto1 When searching I entered ‘Lace Trim”
ClothHouse; https://www.clothhouse.com/shop/things/ The website does not sell Lace but one of the two shops does. You want No.47 but while here why not check out the other shop further down Berwick Street.
Kleins; http://www.kleins.co.uk/ Please take a visit to this shop, the staff are so, so helpful. They sell a vast array of an incredible amount of items, too many to explain.
John Lewis Oxford Street; http://www.johnlewis.com/inspiration-and-advice/sports-crafts-leisure/sewing-and-dressmaking Though the good old glory days of John Lewis Fabric and haberdashery department are long gone…. It still stands as a very good place to go and get all sorts items. I know they sell lace here… You never know!!!
MacCulloch & Wallis; http://www.macculloch-wallis.co.uk/Category.aspx/FineLaces This shop a great favourite of mine and set over 3 floors, I find it very hard not to fall down a few rabbit holes and get my mind thinking onto possible future projects.
VV Rouleaux; http://www.vvrouleaux.com/ I nearly forgot about this
beautiful shop!!! I even love trying to find this place, tucked away, just off
Marylebone High Street.
I have in-fact without realising it, I have given you an afternoon London tour!!!… All of these shops are within walking distance of each other. There are a many more but I think this subject deserves its own complete attention and story… so I am going to park this for another day. Get back on track… LACE!!
Well to my utter delight the hunt was not in vain… Drum roll please…… And the winner is…… Kliens. I splashed out a bit I must admit but things are worth doing properly, and I wanted to add a couple of rows on the ruffles.
I am a firm believer if you are putting all the effort into a project whatever it may be, you should give your work justice, what I have learnt by my bitter mistakes, is to do your research and to think carefully before purchasing anything, you don’t always have to spend a fortune, get samples if you can. You want your pride to shine out of what you have just made.
“Main Construction”
I am at last heading towards the climax of this story. With the pattern altered under the arms, I swapped the pieces around a bit so I could add some balance marks, to make joining all final pieces together easier. I also lined them up a bit so I could look at the bottom hem… I am still hoping the length will work as well as the rest of the pattern did.
The next task is to think about the ruffles.
The book does cover this but as always I wanted to see what else I could find…. so with a bit of digging on-line, I came upon these two equations.
http://historicalsewing.com/how-to-calculate-yardage-for-ruffles and http://historicalsewing.com/ruffle-calculations-for-height-differences Thank you Jennifer Rosbrugh, this is absolutely what I needed. You have a great and wonderful site here… Please carry on with the marvellous and excellent work and I will definitely be back.
Looking again at the picture from the book, there is one long ruffle. Which starts at the knee and is then edged with another ruffle of wide lace, but I want to make this into a smaller plain ruffle (all will become clear later on). Once I have worked you the length of the large ruffle, I used the formulas from the above links to work out how much more fabric I will need, please have a read… Just follow the links.
I reprinted this out and rejoined together.

© akaMissUpton 2015
The larger ruffle then has two rows of lace insertion. Another BIG thank you to Louren. The amount of work that has gone into this…. Fantastic.

@akaMissUpton2015
I decided on fabric before I started, as I have already made the drawers from a pattern I brought ‘Edwardian Undertings’ produced by Folkwear This is a great American website which covers a fantastic range of eras, a company ran with a lot of passion.

© Folkwear 1978. Asheville, North Carolina. http://www.folkwear.com
I thought about using a soft flowing cotton but for my modesty I opted for the same cotton I used on my Victorian Dimity Bustle project, from The Cloth House along the ever changing Berwick Street, Soho in London, No.47…. So off I trot, 1st checking how much I had left over. This is another mistake made by myself constantly, before buying anything check your own stash at home. As making things becomes a part of your life, you purchase bits along the way… Then you get home and realise you have already got it!! so again take your time.
Though this has been a very long while in the making … This has been a really good learning project, the list of things explored has been especially beneficial to the greater cause, I have found some great websites along the way!!
Just before I finished this project the wonderful people at Wardrobe Unlocked published an article on this very same subject. I have mentioned this amazing website before and will again say its worth every penny!! The excellent article is written by Julia Barrett, titled “Mrs Pretty Part 4 – Slips and Petticoats”. They also run another website alongside called Foundations Revealed Support them please!!!


© akaMissUpton 2015
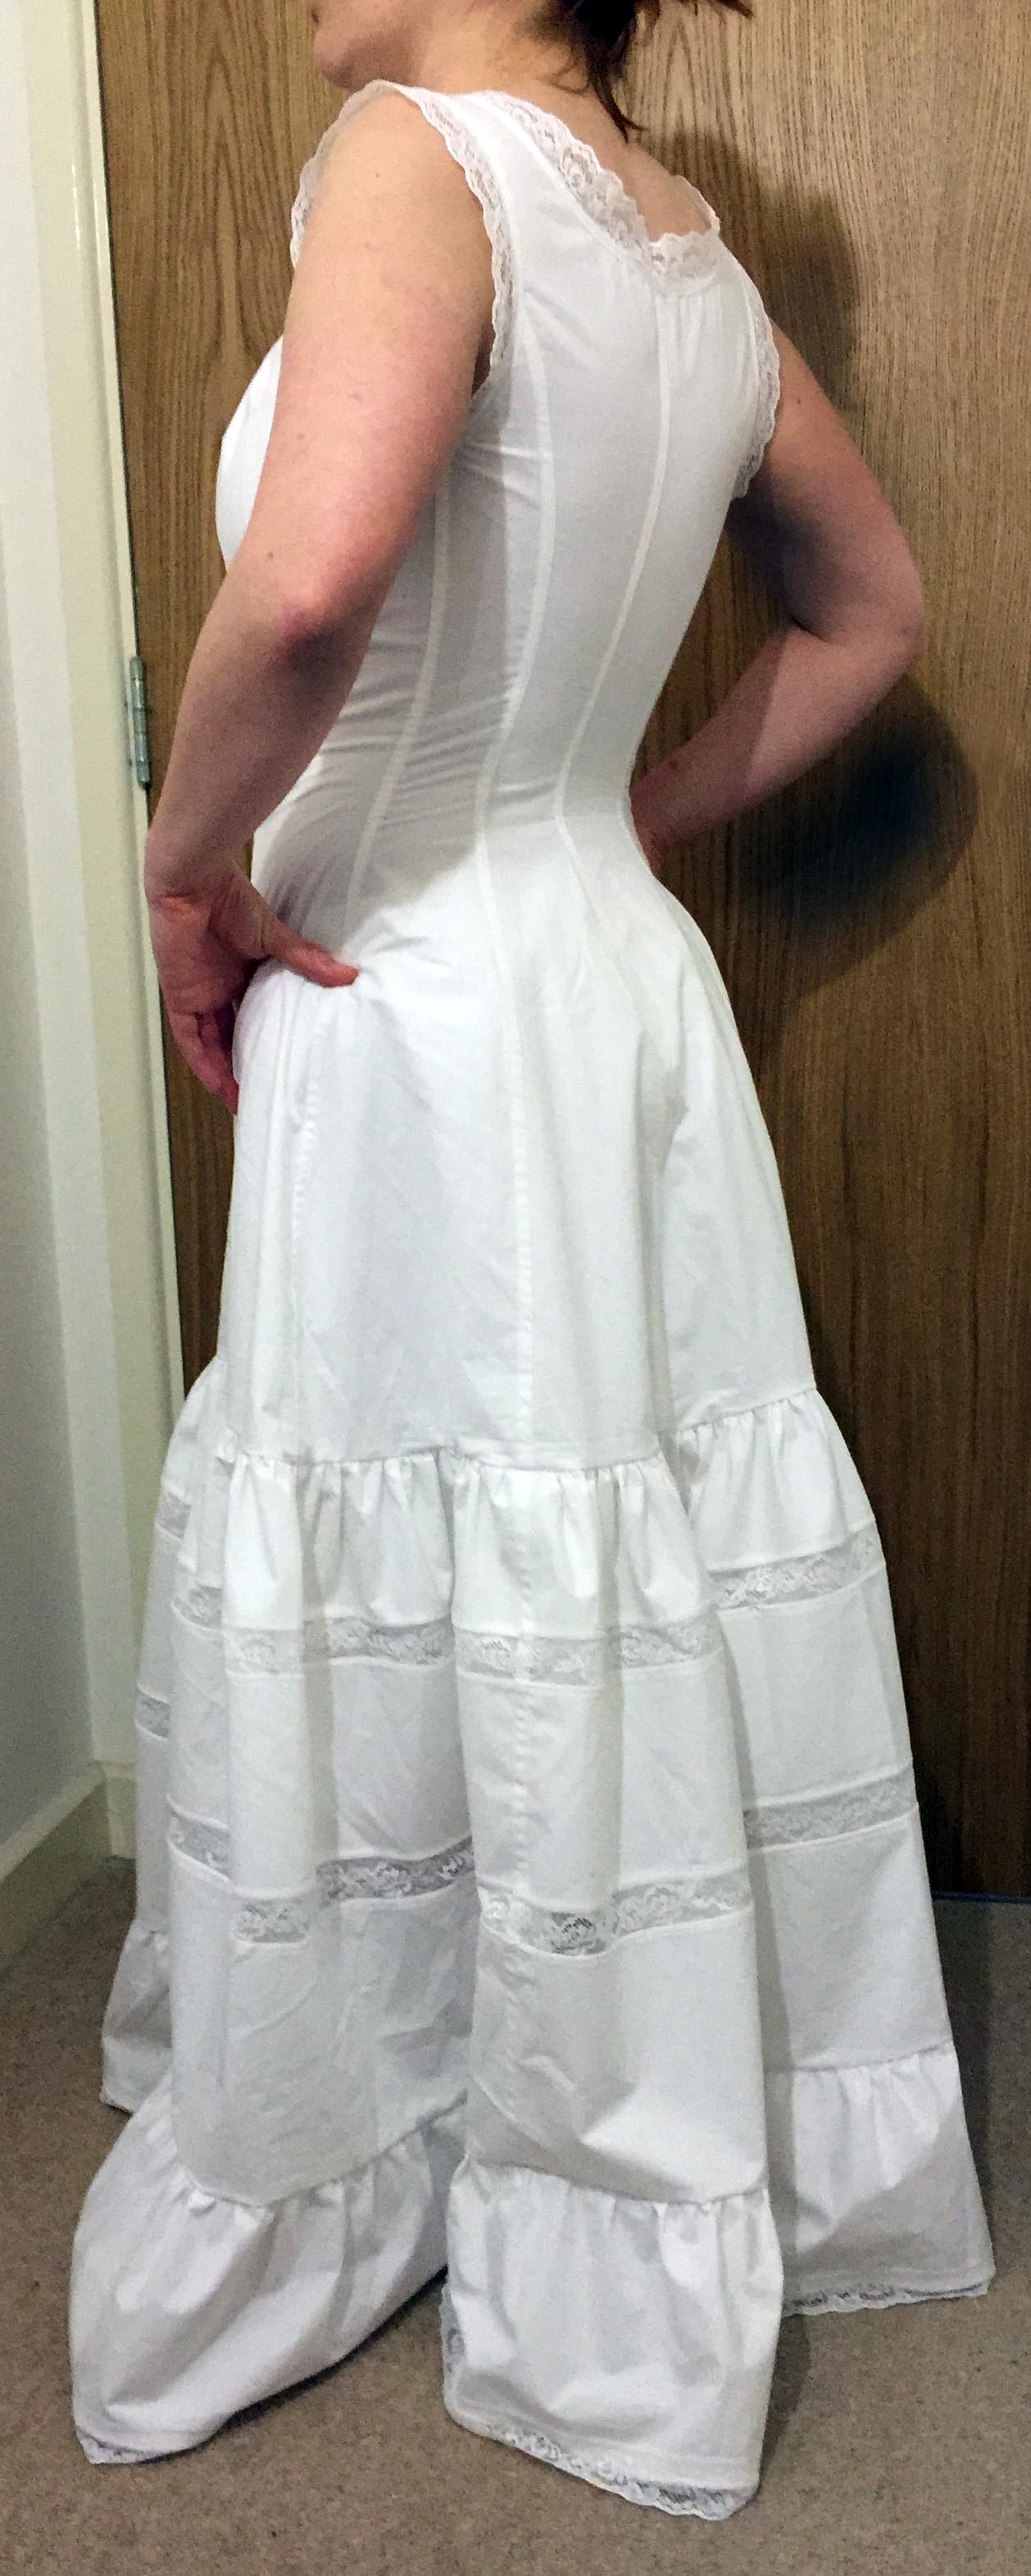
So here we are I have reached the end!!!!!!! Wow… My main comment on this petticoat is the way it makes me stand, it gives the beginning of the shape that we associate with this period. I also love the way it rustles when I walk. The length is also border-line but with some heals it will be prefect. All round I am extremely happy!!! I would finally like to thank everyone again I have mentioned in this post. 😀

It turned out lovely! I’m amazed people can use Illustrator to draft patterns. I’m a paper & pencil girl and enjoy the basic math work. Good job with your pattern!
Thank you very much!! Means a lot. I also love the maths part, it is great a work out for the brain 🙂